Introduction
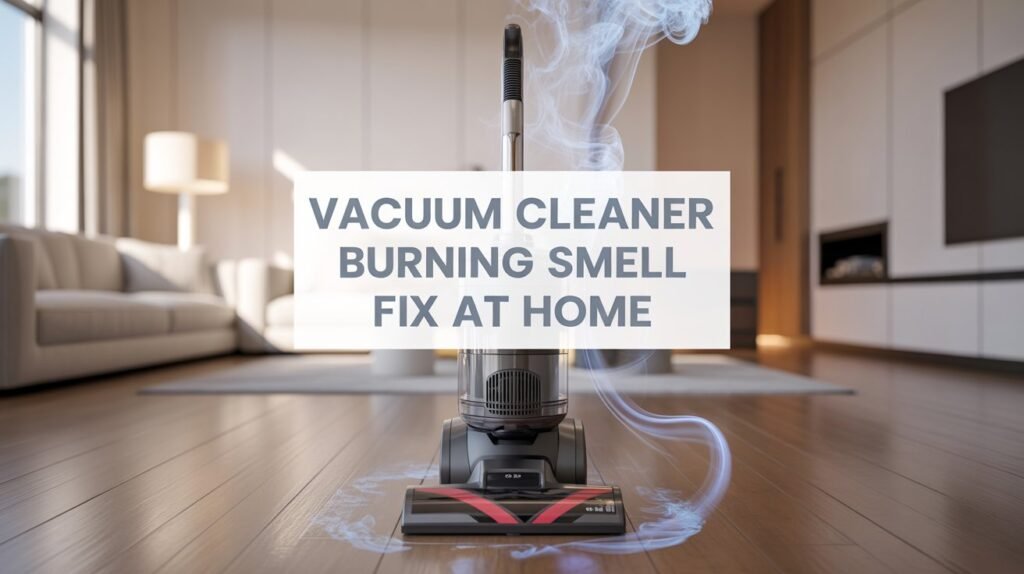
Vacuum Cleaner Burning Smell at Home is one of the most searched problems homeowners face when their cleaning routine suddenly turns stressful. A strange burning odor from your vacuum is not just unpleasant—it can signal serious issues like clogged filters, overheating motors, or worn-out belts. Ignoring it can reduce performance and even damage your machine permanently.
In this guide, you will discover simple, effective, and safe solutions to identify the cause and fix the problem quickly. Whether your vacuum has lost suction or started producing a burning smell out of nowhere, these proven steps will help you restore its performance and keep your home cleaning hassle-free.
Why Does a Vacuum Cleaner Smell Like Burning? Understanding the Root Causes
Before you can effectively fix the problem, you need to understand what’s causing it. A burning smell can originate from several different sources within your vacuum’s system, and identifying which one is responsible will help you address the issue correctly.
The Overheated Motor
The motor is the heart of your vacuum cleaner. When it works efficiently, it can last for many years without issue. However, when the motor is forced to work harder than designed, it generates excessive heat, which can produce that distinctive burning odor.
This typically happens when the motor is struggling against restrictions in the airflow system. When air cannot flow freely through your vacuum, the motor has to expend more energy to maintain suction. Think of it like a person trying to breathe through a blocked straw – eventually, they’ll tire out and overheat.
Several factors can force your motor into overdrive. A clogged filter is one of the most common culprits. As the filter accumulates dust and debris, it becomes increasingly restrictive. Blockages in the hose or dust pathway also force the motor to work harder. Even a full dust container can contribute to this problem, as it reduces the space for air circulation.
The burning smell from an overheated motor often smells acrid and sharp, similar to burning plastic or hot wire. If you notice this smell, you should act immediately, as prolonged overheating can permanently damage the motor windings.
Worn-Out or Damaged Belt
The belt in your vacuum is a critical component that connects the motor to the brush roll. It’s typically made of rubber or a rubber-like synthetic material, and it’s responsible for transferring power from the motor to spin the brush roll. When this belt becomes worn, frayed, or begins to slip, it creates friction against the motor or other components, producing a burning smell.
This is often described as a burning rubber smell – because that’s essentially what’s happening. The rubber is being heated through friction, and as it degrades, it releases that distinctive burnt rubber odor.
Belts can wear out for several reasons. The most common is simply age and normal use. Over time, the rubber loses its elasticity and becomes more prone to cracking. Excessive use without proper maintenance accelerates this wear. If you vacuum several times a week or live in a house with pets that shed constantly, your belt will wear out faster than someone who vacuums monthly.
Another reason belts fail is because they’re forced to work too hard. If your vacuum is clogged or filters are dirty, the belt has to work harder to spin the brush roll, which speeds up its degradation. In severe cases, if the brush roll becomes jammed or stuck, the belt may snap suddenly rather than gradually wearing out.
The good news is that vacuum belts are relatively inexpensive to replace, typically costing between $10 and $30, and the replacement process is usually straightforward enough for homeowners to handle.
Clogged Filters Reducing Airflow
Your vacuum’s filter is essentially a lung for the machine. It captures dust, allergens, and debris while allowing air to pass through. A clean filter is critical to proper vacuum function. When filters become clogged with dust and dirt, they create a significant bottleneck in the airflow system.
Think about what happens when a filter clogs. The motor still tries to create suction, but the filter is blocking airflow like a dam blocks water. The motor has to work increasingly hard to push air through the clogged filter, generating excess heat in the process. This is why clogged filters are one of the most common causes of burning smells.
There are different types of filters in vacuum cleaners. HEPA filters are highly efficient but also more prone to clogging. Foam filters are more durable but need regular cleaning. Pleated filters are common in mid-range vacuums and capture particles effectively but require frequent maintenance.
The problem is compounded if you have a washable filter that you’re not drying completely before reinstalling. Moisture in a filter reduces airflow further and can also create musty or burning smells as the motor heats the damp material.
Most manufacturers recommend checking your filter weekly and cleaning it at least once a month, depending on usage. If you have pets, allergies, or a dusty home, you should clean filters even more frequently.
Blocked Hoses and Air Pathways
Your vacuum’s hose is essentially the breathing tube of the system. When debris clogs the hose, it creates a serious restriction that forces the motor to work much harder. Many people don’t realize how much damage a simple hose blockage can cause.
Blockages typically occur in curved sections of the hose or where the hose connects to other components. A long strand of hair wrapped around internal ridges can catch other debris and quickly build into a significant clog. Dry grass, dust clumps, and even pieces of plastic bags can cause blockages.
The problem with a blocked hose is that the blockage isn’t always obvious. The vacuum might still turn on and make noise, but suction is significantly reduced. Meanwhile, the motor is working hard against the blockage, generating heat and eventually producing that burning smell.
To identify a blockage, hold the hose up to a light and look through it. If you can’t see light coming through, there’s definitely a clog. Even partial blockages should be cleared, as they force the motor to overwork.
Electrical Issues and Wiring Problems
While less common than the other causes, electrical issues can produce a burning smell and represent a serious fire hazard. If your vacuum has damaged wiring, exposed wire insulation, or a failing electrical component, it may produce a sharp, distinctive burning smell that smells like burning plastic or melting insulation.
Electrical burning smells are more serious than mechanical burning smells because they pose a direct fire risk. Water damage, age-related degradation, or impact damage can all cause electrical problems. These issues should not be handled casually and often require professional repair or replacement.
Signs of electrical problems include the smell of burning plastic, visible scorch marks or discoloration on the vacuum body, intermittent operation, or the smell appearing even when the motor isn’t working hard.
The 7 Powerful Fixes for Vacuum Cleaner Burning Smell
Now that you understand what might be causing the problem, let’s walk through the solutions. These fixes are arranged from simplest to most complex, and you should work through them methodically.
Fix 1: Turn Off and Unplug Immediately – Safety First
When you detect a burning smell, your first action should always be safety-focused. Do not continue using the vacuum or attempt to ignore the smell hoping it will go away.
Here’s what you should do immediately:
- Stop the vacuum – Press the power button to turn off the motor.
- Unplug from the outlet – Physical disconnection from power is crucial. Simply turning it off leaves it in a powered state.
- Move to a well-ventilated area – Take the vacuum outside or to an open window. This serves two purposes: it clears the burning smell from your indoor air and prevents potential fire hazards from concentrating fumes.
- Allow adequate cooling time – Set the vacuum aside for at least 20-30 minutes. If the motor overheated significantly, give it an hour to cool down completely.
- Do not attempt to use again immediately – Even after cooling, don’t use the vacuum again until you’ve identified and fixed the problem.
This initial step is critical. Continuing to use a vacuum with a burning smell risks fire and permanent motor damage that will cost you a complete replacement rather than a simple repair.
Fix 2: Check and Clean the Filters Thoroughly
Dirty filters are responsible for approximately 40-50% of vacuum burning smell complaints. This is an easy problem to solve, and filter cleaning should be your first real troubleshooting step after the safety precautions.
Step-by-step filter cleaning process:
- Locate the filter – Check your vacuum’s manual if you’re unsure. Different models place filters in different locations. Some have filters on top, others on the side or inside the dust container.
- Remove the filter carefully – Most filters simply slide or clip out. Gently wiggle it free rather than forcing it.
- Assess the filter condition – Look at the filter closely. Is it covered in thick dust? Can you see light through the pleats when you hold it up to a window? A truly clogged filter will be almost completely obscured with dust.
- Tap out loose dust – Hold the filter over a trash can and gently tap it with the palm of your hand or a soft brush. Tap from the clean side (the inside) of the filter toward the dirty side. This dislodges surface dust without pushing it deeper into the filter material.
- Check the filter type – Is it washable or disposable? Your manual will specify. Washable filters usually have a foam or cloth construction. Disposable filters are often pleated paper.
- Clean washable filters – If it’s washable, rinse it under lukewarm running water. Don’t use hot water, which can damage the filter material. Use gentle water pressure – never use a high-pressure spray. You can use a soft brush to gently brush away stubborn dust. Some manufacturers recommend using a little mild dish soap for heavily soiled washable filters, but rinse thoroughly afterward.
- Replace disposable filters – If your filter is disposable (usually made of pleated paper), it cannot be effectively cleaned. While you might rinse it, most manufacturers recommend simply replacing it with a new one. Disposable filters are typically inexpensive, ranging from $15 to $40 depending on the model.
- Dry completely – This step is absolutely crucial. Before reinstalling any filter, make sure it’s completely dry. Place the filter in a warm, dry location – a sunny windowsill is ideal. Allow at least 12-24 hours of drying time. Installing a damp filter will cause airflow restrictions and can lead to the very burning smell you’re trying to fix.
- Reinstall the filter – Once completely dry, reinstall the filter according to your vacuum’s instructions. Make sure it’s seated properly and any clips or locks are fully engaged.
- Establish a cleaning schedule – To prevent this problem in the future, clean your filter weekly if you use your vacuum frequently, or at minimum every two weeks. If you have pets, allergies, or a particularly dusty home, aim for weekly cleaning.
Fix 3: Inspect and Replace the Vacuum Belt
The belt is one of the most commonly replaced vacuum parts, and it’s often a simple fix for burning rubber smells.
Detailed belt inspection and replacement:
- Prepare your workspace – Before opening your vacuum, unplug it and work in a clean, well-lit area. You may want to use a vacuum bag or work surface to catch any debris.
- Locate the belt – Most belts are accessed through a compartment near the bottom of the vacuum where the brush roll is located. Some models require removing the bottom plate, others have a quick-release panel. Check your manual for specific instructions.
- Examine the belt – Look at the belt carefully. Is it frayed at the edges? Are there visible cracks or splits? Is it discolored or shows signs of heat damage? Does it appear loose or off-center? Any of these signs indicate replacement is needed.
- Test the belt tension – If the belt looks relatively intact, check if it’s slipping. You should be able to move the belt slightly with your finger, but it should also have good tension. A belt that slides easily or seems very loose is likely slipping and causing the burning smell.
- Understand belt types – Vacuum belts come in different types. Standard rubber belts are most common but wear relatively quickly. Serpentine belts offer better durability. Some newer models use geared belts. Identify which type your vacuum uses so you can order the correct replacement.
- Order the correct replacement – Go to your vacuum manufacturer’s website or contact their support to get the exact belt model number for your vacuum. Using the wrong belt can damage your brush roll or motor.
- Replace the belt – This process varies by model, but generally:
- Remove the old belt by sliding it off the motor pulley and brush roll
- Position the new belt around both the motor pulley and the brush roll axle
- The belt should be centered and not twisted
- Check that the belt sits properly in all grooves and that the brush roll spins freely
- Check for other damage – While you have the brush roll compartment open, inspect the brush roll itself for damage, and check that the pulley isn’t cracked or damaged.
- Test the fit – Before closing the compartment, manually spin the brush roll to make sure it rotates smoothly and the belt isn’t slipping.
- Reassemble and test – Close the compartment, plug in the vacuum, and do a brief test in a non-critical area to ensure the belt is working properly.
The entire belt replacement process usually takes 15-30 minutes for someone with basic mechanical skills. If you’re uncomfortable doing it yourself, many appliance repair shops can replace a belt for $50-$100 in labor, plus the cost of the belt itself.
Fix 4: Remove Blockages from Hose and Air Pathways
Blockages are sneaky because they don’t always seem obvious, but they cause significant strain on your vacuum’s motor.
Comprehensive blockage removal process:
- Unplug the vacuum – Always work with an unplugged machine.
- Detach all removable hoses and connections – Carefully disconnect the main hose, any extension hoses, and any hose connections to the dust container or motor unit.
- Visual inspection – Look through each hose section with a bright light. Hold the hose up to a window or use a flashlight. If you can’t see light coming through, there’s definitely a blockage.
- Manual removal – For visible blockages near the ends of the hose:
- If the debris is within reach, grab it with your fingers or tweezers and pull it out
- Be gentle to avoid damaging the hose interior
- Use a straightening tool – For blockages deeper in the hose:
- A straightened wire coat hanger works well
- A plumbing snake is even better
- Gently push the tool through the hose, working slowly to dislodge the blockage
- Don’t apply excessive force, which can crack the hose
- Flush with water – Some blockages (like dried mud or grass) respond well to flushing:
- Connect the hose to your sink faucet or garden hose with adapter fittings
- Run warm water through the hose at moderate pressure
- You might be surprised at what comes out
- Check connection points – Blockages sometimes form where the hose connects to other components:
- Look inside the connection ports
- Use a flexible tool to clear any debris
- Ensure connections are secure after clearing
- Inspect the brush roll area – Blockages can also form in the air pathway around the brush roll:
- Check where the motor connects to the brush chamber
- Clear any lint or debris buildup
- Make sure the path is clear for air circulation
- Reassemble carefully – When reconnecting hoses:
- Make sure connections are airtight
- Any loose connections will reduce suction
- Push connections firmly into place
- Test suction – Before full use, test the suction with a piece of paper. You should hear a strong sucking sound and the paper should be difficult to pull away from the intake.
Fix 5: Empty the Dustbin and Maintain Proper Capacity Levels
Many people don’t realize how much a full dust container affects your vacuum’s performance. This is one of the simplest fixes available.
Proper dustbin and dust bag management:
- Check the maximum fill line – Most vacuums have a fill line indicating maximum capacity. For bagless vacuums, there’s usually a translucent dust container so you can see the fill level.
- Empty regularly – Don’t wait until the container is completely full. The optimal practice is to empty the dustbin when it reaches about 70-80% of capacity. This might seem excessive, but it significantly improves suction and reduces motor strain.
- Empty outdoors when possible – If you have allergies, emptying the dustbin outside prevents dust from dispersing into your home. Hold the container away from your face and open it carefully to avoid dust clouds.
- Clean the dust container – Once emptied, you can wash the dust container with soap and water. Make sure it dries completely before reinstalling.
- Replace vacuum bags on schedule – If you use a bagged vacuum, replace bags when they’re 70-80% full, not when they’re completely stuffed. A overstuffed bag creates serious airflow restrictions.
- Check bag placement – Ensure the bag is properly seated in its holder and isn’t torn or compromised. A torn bag will allow dust into the motor, which is far worse than the burning smell issue.
- Be aware of seasonal variations – During high shedding seasons (pet shedding season or allergy season), you may need to empty the dustbin more frequently. Adjust your schedule accordingly.
- Monitor for unusual fullness – If you notice the container filling unusually quickly, you might have a blockage elsewhere in the system. Investigate if a filter is clogged or a hose is partially blocked.
Fix 6: Clean the Brush Roll Thoroughly
The brush roll gets wrapped in hair, fibers, and debris more than any other component. This buildup creates friction that can produce burning smells.
Complete brush roll cleaning:
- Unplug the vacuum – Always disconnect power before working on brush roll components.
- Access the brush roll – Most vacuums require removing a bottom panel or plate to access the brush roll. Some have quick-release mechanisms.
- Inspect for obvious blockages – Look at the brush roll from multiple angles. Is hair wrapped around it? Is there a layer of lint? Are there plastic strings or fibers tangled in it?
- Cut away tangled hair and fibers – Using small scissors or a seam ripper:
- Carefully cut away hair wrapped around the brush bristles
- Cut fibers and threads entangled in the brush
- Work slowly and carefully to avoid cutting bristles
- Make sure to clear both the sides and middle of the brush roll
- Remove debris between bristles – Using a small stiff brush or old toothbrush:
- Brush between the bristles to dislodge dust and debris
- Work from one end of the brush to the other
- Pay special attention to areas where fibers like to accumulate
- Check bristle condition – Examine the bristles for signs of wear:
- Are they frayed or bent?
- Are they significantly shorter on one side?
- If more than 25-30% of the bristles are damaged, the brush roll should be replaced
- Clean the brush roll axle – The axle (the rod the brush roll spins on) can accumulate debris:
- Wipe it clean with a damp cloth
- Make sure it spins freely without resistance
- Check that bearings aren’t damaged
- Test rotation – Manually spin the brush roll after cleaning. It should rotate smoothly without resistance or grinding sounds.
- Check bearing condition – If the brush roll feels sticky or doesn’t spin smoothly, the bearings might be damaged and the brush roll may need replacement.
- Reassemble and test – Once clean, reinstall the brush roll and test the vacuum on a small area before full use.
Fix 7: Investigate Motor Damage and Know When to Call a Professional
If you’ve worked through all the previous fixes and the burning smell persists, your vacuum might have motor damage that requires professional repair or replacement.
Signs of motor damage:
- Persistent burning smell – Even after cleaning everything and checking for blockages, the smell continues.
- Unusual sounds – Listen for new or unusual sounds:
- Grinding noises indicate bearing damage
- Squealing suggests belt or bearing issues
- Rattling might indicate loose components or internal damage
- These sounds often accompany motor problems
- Weak suction – If you’ve cleared all blockages and cleaned filters, but suction remains weak, the motor might not be generating adequate power.
- Inconsistent operation – If the vacuum sometimes works well and sometimes doesn’t, it might indicate electrical issues or motor windings coming loose.
- Visible damage – Look for scorch marks, discoloration, or burnt sections on the motor housing.
- The smell of burning plastic – This specifically suggests electrical rather than mechanical issues, which is more serious.
Step-by-Step Deep Cleaning Guide for Complete Odor Elimination
Sometimes you need more than just spot fixes. A comprehensive deep clean eliminates burning smell and restores your vacuum to like-new condition.
Complete deep cleaning process:
- Gather supplies:
- Small screwdrivers or hex keys for disassembly
- Small brush and soft cloth
- Warm water and mild dish soap
- Vacuum or compressed air for blowing out dust
- Baking soda (optional, for odor absorption)
- Unplug and prepare:
- Unplug the vacuum
- Work in a well-ventilated area
- Have a waste bin nearby for collecting debris
- Disassemble all removable parts:
- Remove all hoses and hose connectors
- Take out the dust container or bag
- Remove the filter
- If accessible, remove the brush roll
- Detach any additional attachments
- Clean filters:
- Wash filters with warm water
- For stubborn buildup, let them soak for 15-20 minutes
- Rinse thoroughly until water runs clear
- Allow to air dry completely before reinstalling
- Clean the dust container:
- Empty all remaining debris
- Wash with warm soapy water
- For persistent odors, sprinkle baking soda inside and let sit for several hours
- Rinse thoroughly and dry completely
- Clean hoses and connections:
- Flush hoses with water as described earlier
- Wipe down all connection ports with a damp cloth
- Ensure connection points are dry before reassembly
- Check for any cracks in hoses that need replacement
- Wipe internal components:
- Use a dry cloth to wipe any accessible internal surfaces
- Use compressed air to blow out dust from motor housing vents
- Be gentle to avoid damaging delicate components
- Clean the brush roll:
- Follow the detailed brush roll cleaning process described above
- This is often where odors originate
- Let everything dry completely:
- Place all cleaned parts on a clean surface or towel
- Allow at least 12-24 hours for complete drying
- Even slight moisture can cause problems
- Reassemble carefully:
- Start with the brush roll and housing
- Install filters
- Reconnect hoses ensuring all connections are tight
- Place the dust container or bag in its proper position
- Test that everything fits properly
- Test the vacuum:
- Plug it in
- Run it briefly in a non-critical area
- Smell for any remaining burning odor
- Check suction strength
Preventive Maintenance Tips – The Key to Long-Term Performance
The best cure for burning smells is prevention. Regular maintenance is far easier and cheaper than dealing with failures.
Weekly Maintenance Tasks
- Empty the dustbin – Even if not full, emptying weekly maintains suction
- Inspect for obvious blockages – Do a quick visual check of hoses
- Listen while using – Unusual sounds often precede visible problems
Monthly Maintenance Tasks
- Clean the filter – Even if not visibly dirty, clean to maintain airflow
- Check the brush roll – Remove any wrapped hair or fibers
- Inspect the belt – Look for signs of wear or slipping
- Check hoses for blockages – Do the light-through test
Quarterly or Seasonal Tasks
- Replace or deep clean filters – Depending on filter type and usage
- Inspect the motor housing – Look for dust buildup in vents
- Check electrical connections – Ensure all connections are secure and dry
- Test overall performance – Check suction power on a known surface
Annual Tasks
- Replace vacuum belt – If showing any signs of wear, replace annually
- Deep clean entire unit – Follow the comprehensive cleaning procedure
- Have professional inspection – For vacuums over 3 years old, consider professional maintenance
- Evaluate filter replacement – Even if not fully failed, consider replacement for optimal performance
Additional Prevention Tips
- Avoid large debris – Don’t vacuum up items that can clog the system (plastic bags, large paper, string)
- Use appropriate settings – Different floor types require different settings
- Store properly – Keep your vacuum in a dry place when not in use
- Use attachments correctly – Using the right attachment prevents unnecessary strain
- Maintain adequate space – Keep air vents clear of blockages
- Keep pets’ hair managed – If you have shedding pets, keep their hair groomed to reduce vacuum load
Common Mistakes That Damage Your Vacuum
Learning what NOT to do is as important as knowing what to do.
Avoid these critical mistakes:
- Running the vacuum with clogged filters – This is the number one cause of motor damage. Never ignore a reduction in suction.
- Ignoring unusual smells – A burning smell is your vacuum’s distress signal. Address it immediately.
- Using high-heat settings on all flooring – Different surfaces require different brush roll speeds. Using the highest setting on delicate flooring wears components faster.
- Never checking the brush roll – Many people forget this component exists until it’s completely jammed with hair.
- Overfilling dust containers – This reduces airflow and strains the motor. Never exceed the maximum fill line.
- Installing damp filters – This creates airflow restrictions and can cause the very problem you’re trying to prevent.
- Forcing stuck components – If something doesn’t come off easily, you might be doing it wrong. Check the manual or use a different approach.
- Ignoring strange sounds – Grinding, squealing, or rattling sounds indicate problems that will only get worse if ignored.
- Using the vacuum for wet debris – Most vacuums aren’t designed for wet pickup. Wet debris causes clogging and motor damage.
- Delaying filter replacement – Thinking “one more week” often leads to permanent motor damage.
When Should You Replace Your Vacuum Cleaner?
Sometimes repair isn’t the answer. Knowing when to replace rather than repair saves money and frustration.
Consider replacement if:
- The motor is burned out – Motor replacement costs often exceed the value of the vacuum. If your vacuum is more than 5 years old and the motor fails, replacement is usually more economical.
- Repair costs exceed 50% of replacement cost – If you’re quoted $400 to repair a vacuum that costs $600 to replace new, it’s probably time to upgrade.
- Your vacuum is 7+ years old – Even if it still works, older vacuums are less efficient and more prone to problems.
- Repeated failures in different systems – If you’ve already fixed the belt, filters, and hose, and now something else fails, the vacuum might be reaching end of life.
- Significant damage to the housing – Cracks or damage that affects sealing capability often make repair uneconomical.
- Multiple electrical issues – If you’ve noticed burning plastic smell or electrical problems, safety concerns override cost considerations.
- Your current vacuum is outdated – Modern vacuums often have better filtration, quieter operation, and improved efficiency.
Cost Analysis: Repair vs. Replacement
Typical repair costs:
- Filter replacement: $15-40
- Belt replacement: $10-30
- Hose replacement: $20-60
- Brush roll replacement: $30-80
- Motor repair: $150-400+
- Professional labor: $50-150 per hour
New vacuum costs:
- Budget bagless: $200-400
- Mid-range upright: $400-800
- Premium models: $800-1500+
- Robot vacuums: $400-1200
If you’re facing multiple repairs totaling $300+, a new vacuum might be more sensible.
Extended FAQ Section
Is a burning smell from a vacuum dangerous?
Yes, it can indicate overheating or electrical issues. An overheated motor can potentially cause a fire, though this is rare. Electrical burning smells are particularly concerning as they indicate a potential shock or fire hazard. Always take a burning smell seriously and stop using the vacuum immediately.
Can I fix the burning smell myself?
Most issues related to burning smell – clogged filters, blocked hoses, dirty brush rolls, and worn belts – can be fixed at home by most people. Electrical issues should be handled by professionals. Basic mechanical skills and the ability to follow instructions are usually sufficient for DIY repairs.
How often should I clean my vacuum?
For optimal performance and to prevent burning smells, clean your filter at minimum every two weeks, preferably weekly. Empty the dustbin at least weekly and more frequently if you have pets. Deep clean your vacuum monthly or quarterly depending on usage.
Why does my vacuum smell like burning rubber?
This almost always indicates a worn or slipping belt. The rubber belt is friction-heated and as it degrades, it releases that distinctive burnt rubber odor. Replace the belt to resolve this issue.
Can a clogged filter cause a burning smell?
Absolutely yes. A clogged filter is one of the most common causes. It forces the motor to work harder, generating excess heat. Cleaning the filter usually resolves the burning smell immediately.
How long should a vacuum belt last?
With regular maintenance, vacuum belts typically last 6-12 months depending on usage. Heavy users might need annual replacement, while light users might get 18-24 months. Any visible wear is reason to replace.
What’s the difference between washing and replacing filters?
Washable filters are made of foam or cloth and can be rinsed and reused many times. Disposable (paper pleated) filters can’t effectively be cleaned and must be replaced. Always verify your filter type from the manual.
Can I use my vacuum with a wet filter?
No. A wet or damp filter restricts airflow severely and will cause the exact problems you’re trying to prevent. Always ensure filters are completely dry before using the vacuum.
What causes a vacuum belt to slip?
Belts slip when they lose tension or elasticity. Clogged filters and dirty brush rolls that increase resistance force the belt to work harder and slip more. Regular maintenance prevents this.
How do I know if my brush roll is damaged?
If more than 25% of the bristles are bent, broken, or missing, the brush roll needs replacement. You’ll also notice reduced cleaning performance and possibly unusual sounds.
Is it normal to smell dust when my vacuum runs?
A light dust smell is normal, especially when using a vacuum after storage. A strong or acrid burning smell is not normal and indicates a problem.
Can a blocked hose cause motor damage?
Yes, absolutely. A blocked hose forces the motor to overwork indefinitely. If left unaddressed, this can permanently damage motor windings.
How much does a new vacuum cost?
Budget models start around $200, mid-range vacuums cost $400-800, and premium models range from $800-1500. Robot vacuums start around $400.
Should I get my vacuum professionally serviced?
For vacuums older than 5 years or if you’re uncertain about repairs, professional servicing can extend the life. Annual professional maintenance for frequently-used vacuums is reasonable.
Conclusion
A burning smell from your vacuum is concerning, but it’s almost always fixable if you address it promptly. In the vast majority of cases, the cause is one of four common issues: clogged filters, a worn belt, a blocked hose, or a full dust container. These are all preventable through regular maintenance.
The seven fixes outlined in this guide will resolve the burning smell in most situations. Start with the safety precautions, then work methodically through the fixes from simplest to most complex. Most homeowners can handle these repairs in an afternoon with basic tools.