Introduction
Few household chores provide the immediate satisfaction of a freshly mopped room. You set aside time, scrub away the daily grime, and step back to admire a gleaming surface. Then, the frustration sets in: as soon as the surface catches the light, you see a trail of dull, hazy outlines, smudges, or direct shoe marks mocking your hard work.
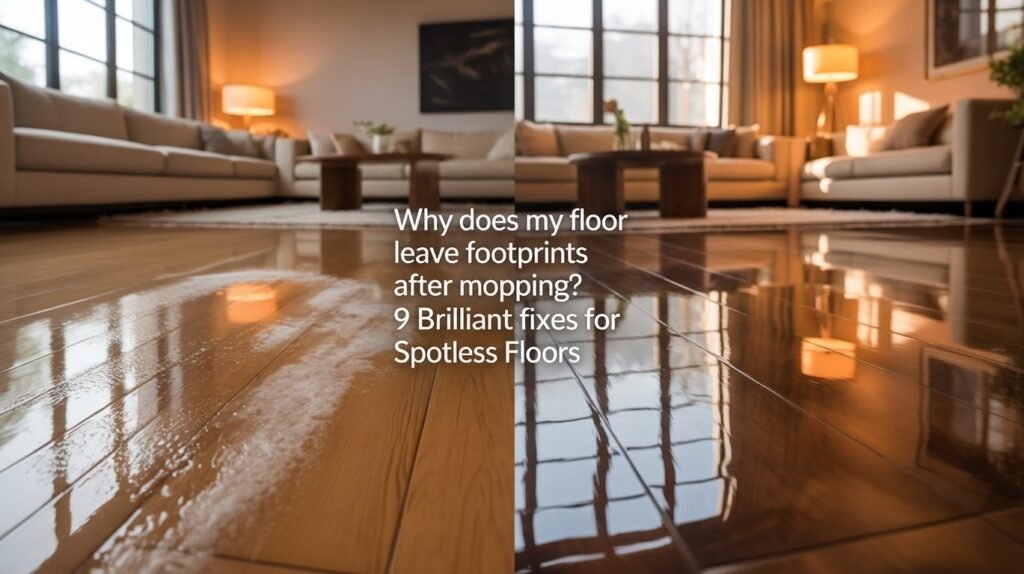
If you find yourself asking, “Why does my floor leave footprints after mopping?” you are dealing with a surprisingly common issue. This phenomenon is rarely down to bad luck; instead, it is almost always a structural side effect of chemical residue, lingering surface moisture, hidden fine dirt, degraded floor finishes, or subtle flaws in your cleaning routine.
In this comprehensive guide, you will learn the precise mechanical and chemical reasons why these tracks appear. We will break down nine distinct culprits sabotaging your hard work and provide actionable, professional-grade strategies to ensure your surfaces dry to a flawless, mirror-like finish every single time.
Table of Contents
Why Does My Floor Leave Footprints After Mopping?
The Short Answer
The underlying cause of post-mop footprints is the presence of an unstable, sticky, or moist microscopic film on the surface. When you step on a floor that has been improperly cleaned, dried, or rinsed, your weight compresses this film—which is typically composed of concentrated cleaner residue, dirty water minerals, trapped body oils, or hard water deposits. This compression alters how light reflects off the surface, creating highly visible footprints. To prevent this, you must eliminate chemical buildup, maintain immaculate cleaning tools, use structurally appropriate cleaners, and ensure the floor is completely dry before introducing foot traffic.
Quick Reference: Floor Type vs. Cleaning Guide
| Floor Type | Main Cause of Footprints | Recommended Cleaner | Drying Time |
| Ceramic/Porcelain Tile | Hard water scale & soap film accumulation | Diluted neutral pH tile cleaner | Medium (Air dry or microfiber buff) |
| Sealed Hardwood | Trapped moisture & inappropriate wax products | Specialized no-wax hardwood cleaner | Fast (Must dry quickly to protect wood) |
| Laminate | Standing water retention & chemical film | Streak-free, low-moisture laminate spray | Very Fast (Dries nearly instantly) |
| Luxury Vinyl Plank (LVP) | Factory coating cross-reactions & oil buildup | Stripped pH-neutral vinyl cleaning solution | Fast (Air dry with active ventilation) |
Tools and Supplies You’ll Need
Achieving a streak-free floor requires moving away from traditional, low-efficiency cleaning tools. Professional results demand deliberate equipment choices:
Microfiber Mop
Unlike cotton string mops that merely push dirty water across a flat surface, microfiber mop pads feature split synthetic fibers. These fibers create microscopic hooks that lift, trap, and hold onto fine dirt and oil particles rather than leaving them behind to dry into a cloudy haze.
Two-Bucket Cleaning System
One bucket holds your carefully diluted cleaning solution; the second bucket contains pure, clean water dedicated solely to rinsing your dirty mop head. This simple structural addition prevents you from repeatedly dipping a soiled mop back into your clean chemical mix.
pH-Neutral Floor Cleaner
Harshly acidic or highly alkaline commercial cleaners break down factory floor sealers and leave sticky surfactant layers behind. A chemically balanced, pH-neutral formula dissolves target soils safely without dropping a heavy layer of unrinsable chemical byproduct.
Soft Microfiber Dry Cloth
A dedicated dry cloth or dry microfiber pad acts as a mechanical buffer. It lifts away standing moisture and breaks up any faint cleaner boundaries before they have an opportunity to cure in the open air.
Vacuum Cleaner or Soft Broom
An efficient vacuum cleaner equipped with a hard-floor mode or a high-density, soft-bristle broom is non-negotiable. It captures fine dust, pet dander, and structural grit that would otherwise dissolve into mud when hit by a wet mop.
9 Reasons Your Floor Shows Footprints After Mopping
Too Much Cleaning Solution Was Used
Why Soap Residue Causes Footprints
Commercial floor cleaners are rich in surfactants—chemical agents designed to attach to dirt and lift it away. However, if you add too much product to your bucket, the water becomes oversaturated. When the water evaporates, these dense surfactants remain on the floor as a microscopic, soft, sticky soap film. This film behaves exactly like a layer of low-grade adhesive, grabbing onto the bottom of your socks, shoes, or bare skin.
Signs You Have Cleaner Buildup
- The floor feels slightly tacky, sticky, or produces a soft “clicking” sound when walked on.
- The surface looks dull or cloudy when viewed at an angle against natural light.
- Scratching the surface gently with a fingernail leaves a visible white, waxy line.
How to Fix It
You must strip the accumulated soap layer. Run a series of deep-rinse cycles using nothing but warm, pure water (or water with a single cup of white distilled vinegar added to break down alkaline soap bonds). Continue this process until the rinse water stops foaming or bubbling.
Dirty Mop Water Is Spreading Dirt Around
Why Dirty Water Leaves Marks
When you dip a dirty mop back into a single-bucket setup, the water quickly turns into a muddy tea of suspended dirt, skin cells, and micro-debris. As you apply this mixture to the floor, the water dries, but the suspended sediment settles evenly across the surface. Walking across this microscopic layer shifts the loose silt, exposing the cleaner floor beneath and forming distinct footprint tracks.
When to Change Mop Water
As a strict rule of thumb, change your mopping bucket as soon as the water loses its transparency and turns a hazy gray or brown. For larger floor plans, this change should happen roughly every 150 to 200 square feet.
Best Cleaning Practices
Adopt the two-bucket method. Dunk your soiled mop pad into the clean water rinse bucket, wring it out thoroughly, and only then re-dip it into your clean detergent bucket. This keeps your cleaning solution pristine from start to finish.
Excess Moisture Is Left on the Floor
How Wet Floors Attract Footprints
Water lowers the surface tension of a floor and softens any existing waxes or sealers. If an area remains wet for more than a few minutes, any foot traffic will plunge directly into that liquid barrier, trapping environmental dust and oils instantly.
Proper Drying Techniques
Never allow pools or puddles of water to air-dry naturally. Use a thoroughly wrung-out mop to pick up excess moisture, turn on ceiling fans, open windows to promote cross-ventilation, or run a dry microfiber flat mop over the area immediately after cleaning.
Hard Water Residue Is Building Up
What Mineral Deposits Look Like
If your tap water is rich in calcium, magnesium, and silica, you are mopping with hard water. When this water evaporates into the air, these dissolved rocks cannot vaporize; they stay behind as a white, chalky, or cloudy mineral film known as limescale.
How To Remove Hard Water Film
To eliminate hard water deposits, mix a mild, organic acid into your cleaning solution, such as a 1:10 ratio of white distilled vinegar to water (note: avoid vinegar on unsealed stone or sensitive hardwood). Alternatively, use bottled distilled water for your final mopping pass.
Your Mop Head Is Dirty
Hidden Dirt and Oil Buildup
A mop head is a highly efficient trap, but it has a finite capacity. Once a microfiber pad or string mop head becomes saturated with old grease, hair, and biological oils, it stops absorbing dirt. Instead, it acts as a paintbrush, coating your rooms in a fine layer of recycled grime.
When to Wash or Replace Mop Pads
Detachable microfiber pads must be washed in a washing machine after every single use. Laundering them inside a protective mesh bag with a residue-free detergent—and absolutely no fabric softener (which coats fibers in oil)—restores their electrical charge and cleaning capacity. Replace worn pads every 3 to 6 months.
You’re Using the Wrong Cleaner for Your Floor Type
Tile Floor Cleaners
Many traditional floor cleaners contain heavy chemical polishes or animal fats designed to make floors look shiny. On glazed ceramic or porcelain tiles, these oils cannot penetrate the non-porous glass surface. They sit permanently on top, creating an oily playground for shoe marks.
Laminate Floor Cleaners
Laminate is highly sensitive to moisture and oil-based soaps. Using soap-based wood cleaners on laminate leaves a thick, oily film that ruins the clear wear layer and amplifies every heel mark.
Hardwood Floor Cleaners
Hardwood requires specialized, fast-drying formulas that respect the underlying polyurethane or oil finish. Heavy multi-purpose cleaners can chemically pit the finish, softening it and making it highly vulnerable to footwear impressions.
Vinyl Floor Cleaners
Luxury Vinyl Plank (LVP) and sheet vinyl are engineered with advanced polyurethane topcoats. Strong solvents, ammonia, or paste waxes chemically degrade this material, resulting in a permanent dullness that highlights smudges.
The Floor Finish or Sealer Is Wearing Off
Warning Signs of a Worn Finish
- Footprints appear even when you clean with distilled water and zero soap.
- High-traffic lanes look dark, rough, or consistently dirty compared to corners.
- Liquid dropped onto the floor absorbs immediately rather than heading into tight, round beads.
When Resealing Becomes Necessary
When a floor’s structural finish wears away, the raw, porous core material is exposed. This bare material absorbs moisture, body oils, and environmental soot like a sponge. Once your finish reaches this stage of degradation, no amount of mopping will fix the footprints; the floor must be professionally stripped, sanded, and resealed.
Oils and Grease Remain on the Surface
Common Sources of Floor Oils
Kitchen grease vapors settle silently onto nearby dining and living room floors. In addition, lotion, bare feet, and pet paws track deep lipid layers down hallways. Standard mopping solutions often glide right over these hydrophobic oils rather than breaking them down.
How to Remove Residue Properly
To combat heavy oil slicks, employ a specialized degreasing agent or a highly diluted, premium dish soap mixture. The grease-cutting properties break down the stubborn lipids, allowing your microfiber mop to pull them off the surface.
Humidity and Environmental Conditions
Why Weather Affects Floor Appearance
On hot, sticky days with high relative atmospheric humidity, moisture cannot evaporate efficiently from the floor. The water sits lingering on your hard surfaces for extended periods, remaining open to any dust falling from the air or tracking from shoes.
Prevention Tips
On high-humidity days, avoid damp-mopping unless you run your home air conditioning unit or a standalone dehumidifier. This drops the indoor dewpoint and forces the remaining water off your floors rapidly.
How to Stop Footprints After Mopping (Step-by-Step)
Follow this precise, professional protocol to eliminate tracking once and for all:
Step 1 – Vacuum or Sweep Thoroughly Before Mopping
Never introduce water to a floor that still holds loose, dry debris.
Vacuum Cleaner Not Picking Up Dirt Properly? Fix It Fast (7 Easy Solutions)
Why Dust Causes Footprint Marks
When dry dust particles meet moisture, they dissolve into an ultra-fine slurry. This slurry distributes evenly across the floor during your mop stroke and dries into a subtle grit film that shifts and prints under any foot pressure.
Best Way to Remove Fine Debris Before Mopping
Utilize a high-powered canister or upright vacuum cleaner equipped with a soft, dedicated bare-floor brush beam. Avoid running a standard spinning carpet beater bar over hard floors, as its stiff nylon bristles will fling fine dust back up into the air, only for it to land directly on your wet floor later.
Step 2 – Use the Correct Floor Cleaner
Choosing the Right Product for Your Floor Type
Always verify your product choice matches your specific flooring material. For stone and general tile, verify it states “pH-neutral.” For modern wood alternatives, use targeted, residue-free rinseless formulations.
Avoiding Cleaner Buildup
Steer clear of any product promising to “Clean and Shine in One Easy Step!” These formulas use inexpensive polymers or oils to artificially boost gloss. This leaves a soft, synthetic layer on your floor that acts like a magnet for footprints.
Step 3 – Mix Cleaning Solution Correctly
Why Over-Concentrated Solutions Cause Residue
More chemical does not equate to a cleaner home. When you exceed the manufacturer’s structural dosing instructions, the water becomes a thick vector for excess surfactants that cannot be wiped clean.
Recommended Dilution Practices
Use an accurate liquid measuring cup rather than free-pouring. If the label calls for one ounce of cleaner per gallon of water, measure exactly that amount. When in doubt, lean toward a weaker mixture; a leaner cleaning solution is vastly easier to manage than an oversaturated one.
Step 4 – Mop With Clean Water
How Often to Change Mop Water
Monitor your buckets closely. If you are cleaning a high-traffic kitchen or an entrance foyer, be prepared to swap out your rinse and detergent water multiple times.
Signs Water Is Too Dirty
If the water appears cloudy, dark, or has a film floating on its surface, stop immediately. Continuing to clean with this water will only undo your progress.
Step 5 – Rinse the Floor When Necessary
Floors That Benefit From Rinsing
Even modern “no-rinse” cleaners can build up over time if used weekly. Polished porcelain tiles, high-gloss laminates, and dark vinyl planks benefit immensely from an independent fresh-water rinse pass to lift lingering surfactant layers.
How to Rinse Without Leaving Streaks
Dampen a brand-new or completely clean microfiber pad with pure, lukewarm water. Glide it smoothly across your freshly cleaned floors using a consistent, fluid figure-eight motion.
Step 6 – Allow the Floor to Dry Completely
Why Drying Matters
Walking on a floor that is even 5% damp will leave temporary impressions that harden into permanent, visible smudges once evaporation finishes.
Ways to Speed Up Drying
Turn on your HVAC system fan, position a portable box fan facing the room, or use a clean window squeegee wrapped in a dry microfiber towel to physically remove remaining moisture from the space.
Step 7 – Buff the Surface if Needed
When Buffing Helps
If your floor naturally has a high-gloss specular finish, it will always show minor imperfections. Buffing provides the final polished look.
Tools That Work Best
Attach a clean, thick, bone-dry microfiber pad to your flat mop pole. Walk backward out of the room, running the dry pad over the floor in wide, rhythmic strokes to lift any remaining droplets or cleaner boundaries.
How Different Floor Types React to Footprints
Understanding the physics of your specific flooring material helps you stop footprints at the source:
Ceramic Tile Floors
Ceramic tile is highly non-porous, meaning liquids cannot sink into the body of the tile itself. Any cleaner residue or hard water mineral content has nowhere to go; it sits on top of the smooth glaze, creating a very obvious cloudy layer that shifts underfoot.
Porcelain Tile Floors
Porcelain is even denser and less porous than standard ceramic. Because it reflects light almost like a glass mirror, any footprint or smudge disrupts the light refraction instantly, making marks highly visible from across the room.
Sealed Hardwood Floors
Polyurethane coatings on hardwood floors are designed to be completely smooth and water-resistant. If you use a wet string mop, water pools in the micro-grooves and grain. This softens the topcoat, making it highly susceptible to deep sock prints and shoe tracking.
Laminate Floors
Laminate features a photographic layer covered by a transparent, resin wear layer. Because this material is essentially a premium plastic coat over dense fiberboard, it cannot absorb oils.
Any oily residue sits directly on top of the clear wear layer, causing footprints to appear with even the lightest steps.
Luxury Vinyl Plank (LVP) Floors
Modern LVP often comes pre-treated with a matte or textured factory topcoat designed to mimic authentic wood grains. However, this texturing can trap fine dust particles and oily residues in its micro-grooves, which then release under the warmth and pressure of bare feet to create highly visible tracks.
Floor-Specific Solutions for Footprints
Tile Floors
To keep your tile clean and clear, switch away from heavy commercial detergents and use a mixture of warm water and a few drops of specialized, rinse-free neutral tile cleaner. Focus on cleaning your grout lines as well, as old dirty water can accumulate in these lower channels and spread back onto your clean tiles with every step.
Laminate Floors
Laminate requires a low-moisture approach. Ditch the traditional bucket entirely and use a fine-mist spray bottle filled with a dedicated laminate cleaner or a mix of isopropyl alcohol and distilled water. Spray lightly and wipe immediately with a clean microfiber flat mop.
Hardwood Floors
How to Vacuum Hardwood Floors Without Scratches: 7 Proven Tips for Safe Cleaning
For hardwood floors, use a well-wrung, damp microfiber pad along with a dedicated, professional wood cleaner. Never allow any standing water to pool on the wood joints, and dry the area manually if it does not evaporate within two minutes.
Vinyl Floors
Vinyl stands up well to regular cleaning, but it reacts poorly to oily soaps and waxes. Use a simple solution of a pH-neutral vinyl cleaner mixed with clean water. If your vinyl has a heavy buildup of old cleaner, strip it back with a single wash of warm water and a cup of pure white vinegar, then follow up with a clean water rinse.
Common Mopping Mistakes That Cause Footprints
Are you accidentally causing your own floor issues? Avoid these common mistakes:
Using Too Much Water
Saturating your floor slows down drying times significantly and allows dirt to settle into pools, leaving noticeable rings and edges when the water finally dries.
Using Too Much Cleaning Solution
Adding extra soap creates a thick surfactant layer that traps dirt and dust, guaranteeing an outline every time someone walks across the room.
Reusing Dirty Mop Pads
Mopping an entire home with a single mop pad just spreads old dirt around. Switch out your microfiber pads frequently as you move from room to room.
Walking on the Floor Before It Dries
It can be hard to wait, but stepping on a damp floor transfers the oils and dust from your feet right into the wet layer, locking in footprints as it cures.
Skipping Pre-Cleaning
If you don’t vacuum or sweep thoroughly before you start, you are essentially mopping a layer of loose dirt, turning it into a cloudy mud that dries into a visible haze.
Can Your Vacuum Affect How Clean Your Floors Look?
Why Proper Vacuuming Matters Before Mopping
A high-quality vacuum cleaner is your first line of defense against post-mop footprints. If your vacuum isn’t picking up fine dust and pet dander, those tiny particles will dissolve into your mop water, leaving a thin film of dirt across the entire floor.
Signs Your Vacuum Is Not Cleaning Efficiently
If your vacuum has weak suction, clogged filters, or a completely full dust container, it will end up leaving fine dust behind or blowing it back out into the air. Make sure to clean your filters and empty the bin regularly so your pre-mop vacuuming actually removes the hidden dirt.
How Professional Cleaners Prevent Footprints After Mopping
You can achieve the same flawless results as commercial cleaning crews by adopting their professional techniques:
Using Microfiber Mop Systems
Pros avoid old-fashioned cotton string mops. They rely on commercial flat-mop systems with high-grade microfiber pads that lift and trap grease and soil rather than just sliding it around.
The Two-Bucket Cleaning Method
Professionals know that a single bucket means you’re cleaning with dirty water. They always use a two-bucket system—one for fresh cleaning solution and one for rinsing the dirty mop—to ensure no old grime goes back onto the floor.
Using Neutral pH Floor Cleaners
Experienced cleaners avoid harsh, heavily scented chemicals. They choose neutral pH cleaners that break down surface dirt effectively without damaging modern floor sealers or leaving a sticky chemical film behind.
Controlled Drying Techniques
Pros don’t just wait around for a floor to air-dry. They use air movers, turn on ceiling fans, or follow up their wet pass with a dry microfiber buffing pad to dry the surface quickly and prevent streaks.
Common Myths About Floor Footprints
More Cleaner Means Cleaner Floors
This is the most common cleaning mistake. Extra soap doesn’t clean better; it just leaves a thick, sticky film on your floor that traps dirt and shows every single footprint.
Hot Water Always Cleans Better
While hot water is great for cutting through grease, extremely hot water can cause some floor cleaners to evaporate too quickly, leaving uneven chemical streaks before you can wipe them away.
All Floor Cleaners Work the Same
Every flooring material is different. Using a cleaner designed for durable ceramic tile on a sensitive laminate or hardwood floor can degrade the finish and leave a permanent haze.
Footprints Mean the Floor Is Dirty
Not necessarily. Most of the time, footprints are just impressions left in a clean layer of leftover soap or mineral residue, rather than actual dirt tracking.
When Footprints After Mopping Indicate a Bigger Problem
If you’ve adjusted your cleaning routine and still see footprints, your floors might have an underlying issue:
Worn Floor Finish
When the protective finish on hardwood or tile wears thin, the bare, porous material underneath is exposed. This raw surface absorbs oils and moisture easily, creating permanent smudges that won’t mop away.
Wax Buildup
Using old-school floor waxes or “shine-enhancing” cleaners can create a thick, soft buildup over time. This soft layer easily takes impressions from shoes and bare feet, requiring a deep strip and clean to fix.
Hard Water Deposits
If your home has very hard water, every mop pass adds a layer of mineral scale to your floors. Over time, this creates a permanent dull look that highlights every footprint.
Subfloor Moisture Issues
In rare cases, persistent footprints can be caused by moisture seeping up from a concrete subfloor. This moisture travels through your flooring and creates a microscopic dampness on the surface that traps dust and oils instantly.
Real-Life Troubleshooting Examples
Footprints on Tile Floors After Every Mop
- Likely Cause: Too much heavy, scented dish soap or floor cleaner, combined with hard tap water, leaving a thick, sticky film.
- Practical Fix: Strip the floor using a mix of warm water and a cup of white distilled vinegar, then switch to a properly diluted neutral pH tile cleaner.
Hardwood Floors Showing Shoe Prints
- Likely Cause: Using an oily wood soap or a string mop that leaves behind too much water, softening the polyurethane coat.
- Practical Fix: Clean the floor using a tightly wrung microfiber pad and a specialized, residue-free hardwood spray cleaner.
Laminate Floors Looking Dirty After Cleaning
- Likely Cause: Excess water pooling in the joints or using a heavy floor wax that sits on top of the non-porous laminate wear layer.
- Practical Fix: Stop using traditional mop buckets. Use a light misting spray bottle and a dry microfiber pad to buff the surface clean.
Vinyl Floors Showing Smudges and Tracks
- Likely Cause: The factory matte finish is reacting with a harsh chemical cleaner, or sticky oils are building up in high-traffic areas.
- Practical Fix: Deep-clean the floor using a diluted degreasing solution or a dedicated vinyl cleaner, and always make a final pass with a clean water rinse.
Best Practices for Keeping Floors Footprint-Free
- Use Microfiber Mop Heads – They physically lift and remove oils and dirt instead of pushing them across the floor.
- Change Cleaning Water Frequently – Never let your mop water turn gray; keep it fresh to prevent spreading dirt around.
- Follow Cleaner Instructions Carefully – Always measure your cleaning solution accurately to avoid leaving a sticky soap residue.
- Maintain Floor Sealants – Keep an eye on your floor’s protective coating and reseal it when it shows signs of wear.
- Keep Shoes Off Freshly Cleaned Floors – Give your floors at least 20 to 30 minutes to dry completely before allowing anyone to walk on them.
- Clean High-Traffic Areas More Frequently – Sweep or vacuum entryways and hallways often to stop dirt from spreading to the rest of your home.
H2: Final Checklist Before You Mop
Before you start your next cleaning session, run through this quick checklist to ensure a perfect, streak-free finish:
- Have You Vacuumed the Floor? – Ensure all fine dust and loose grit are completely removed.
- Is Your Mop Pad Clean? – Start with a freshly laundered microfiber pad, free of old oils and fabric softeners.
- Are You Using the Correct Cleaner? – Double-check that your product is safe and designed for your specific floor type.
- Did You Mix the Solution Correctly? – Verify you’ve measured the exact dilution ratio to prevent soap buildup.
- Do You Have Fresh Water Ready? – Set up your two-bucket system so you can rinse your mop properly.
- Is There a Drying Plan? – Turn on fans or open windows to ensure the room dries quickly and evenly.
People Also Ask
Why does my floor still look dirty after mopping?
This is usually caused by a buildup of old cleaner residue or mopping with dirty water. The water evaporates, leaving a cloudy layer of soap and fine dirt across the surface.
Why do footprints appear on tile floors after cleaning?
Glazed ceramic and porcelain tiles are completely non-porous. If your cleaner contains heavy oils or you have hard water, those residues sit on top of the tile and form a film that shows footprints clearly.
Can too much floor cleaner leave marks?
Yes, using too much cleaner is the number one cause of post-mop streaks and footprints. The excess soap leaves a sticky layer behind that traps dirt and dust from your feet.
Does hard water cause footprints on floors?
Absolutely. When hard water dries, it leaves behind dissolved minerals like calcium and magnesium. This creates a chalky haze on the floor that shifts and shows marks when walked on.
Why does my floor feel sticky and show footprints?
Why Does My Floor Feel Sticky After Mopping?
A sticky floor is a classic sign of soap buildup. It happens when you use too much cleaning solution, use the wrong type of product, or skip the final fresh-water rinse pass.
Should I rinse my floor after mopping?
Yes, making a final pass with a clean, damp microfiber pad and pure water is an excellent way to remove any lingering cleaner residue and prevent footprints.
Can a dirty mop cause footprint marks?
Yes. If your mop head is full of old grease and dirt, it cannot absorb new soil. Instead, it just spreads a fine layer of grime across the floor that dries into a hazy film.
How do professionals prevent footprints after mopping?
Pros use specialized microfiber flat mops, follow the two-bucket method to keep their water clean, use neutral pH cleaners, and ensure the floor dries quickly with fans or dry buffing.
Why do my floors show footprints only in certain rooms?
High-traffic areas like kitchens and entryways accumulate more airborne grease, body oils, and outdoor dirt, making them much more prone to residue buildup and footprints.
Can humidity make floor footprints worse?
Yes. High humidity slows down the drying process, leaving the floor damp for longer and allowing falling dust to settle into the wet surface, which locks in footprints.
Expert Tips for Streak-Free, Footprint-Free Floors
Follow a Consistent Cleaning Routine
Don’t wait for your floors to look visibly dirty before cleaning them. Weekly maintenance prevents dirt and oils from grinding into the surface, making them much easier to clean without needing heavy chemical products.
Match the Cleaner to the Floor Type
Never use multi-surface cleaners blindly. Keep a dedicated pH-neutral cleaner for your tile and stone, and a specialized, fast-drying spray for your wood or laminate floors to protect their unique finishes.
Replace Worn Cleaning Tools
A worn-out mop pad or a vacuum with low suction will always make your job harder. Inspect your cleaning tools regularly and replace old microfiber pads or worn vacuum brushes to keep your routine efficient.
Address Floor Finish Problems Early
If you notice that your hardwood looks dull or your tile grout is deeply stained, don’t try to fix it with extra mopping. Address finish wear early by resealing or polishing the floor to keep it easy to clean.
Use Proper Vacuum Maintenance
Keep your vacuum running perfectly by emptying the dust bin after every use and washing the filters regularly. A clean vacuum removes the fine dust that would otherwise turn into a streaky mud when you mop.
Avoid Over-Cleaning With Chemicals
It’s tempting to use strong chemicals to get a deep clean, but less is almost always more. Stick to mild, correctly diluted cleaners to keep your floors safe from heavy residue buildup.
Conclusion
Key Takeaways
Footprints appearing on a freshly mopped floor are almost always caused by a few common culprits: excessive cleaning solution, dirty mop water, leftover surface moisture, hard water minerals, or using the wrong product for your specific floor type.
To break this cycle, always remember that preparation and proper technique matter just as much as the cleaning products you choose. Start with a thorough vacuuming pass to remove fine dust, use a clean microfiber mop with a two-bucket system, and stick to a properly diluted, pH-neutral cleaner. Finally, give your floors the time they need to dry completely before allowing any foot traffic back into the room.
By identifying the exact cause of the residue on your specific flooring type, you can easily adjust your routine and enjoy clean, streak-free floors that stay beautiful and footprint-free.